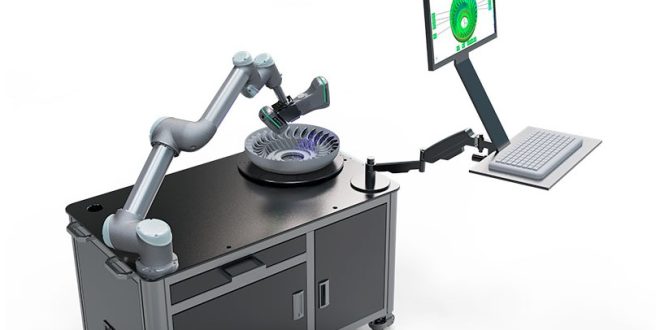
Doing everything yourself makes you confident enough to try new things without worrying about failure. If you have always wondered what it would be like to have a 3D scanner at home, it is now time to build one.
One can easily change the way they 3D print by doing it at home without having to opt for the expensive models. Nothing is perfect but they will work decently depending on need. In this guide, we aim to give you good ideas on how, to begin with, the crafty process of making a 3D scanner at home.
The Cheapest Scanner

Materials Required
- Lasers (1 to 4)
- A stepper motor
- An Arduino Nano
- A turntable
We call this the cheapest alternative because it will cost only about $35 to $50. It is entirely dependent on whether you buy new or second-hand parts. This is the perfect option to choose if you have a 3D printer because the basic structure will have to be done through it. There is multiple open-source software available to access for anyone interested.
If you are trying something like that for the first time, it makes for a good starter because it will help YouTube confidence on how to build a very basic scanner. There is always room to upgrade in the future if your demands change. The basic structure is something that would need to be perfected once assembled. That is the case with anything which is built at home so make sure to see it through.
It is one of the most popular ways in which scanners are made. There are many articles and forums dedicated to perfecting the model. So if any issue or query arises during construction, one can easily get it resolved by a quick search online. The community is very supportive so take advantage of this.
Scanner with a DSLR Camera

Materials Required
- A DSLR camera
- An Arduino Nano
- An LCD screen
- A stepper motor and driver
- An IR LED
This is the next upgrade to the design which comes with a better resolution. It will of course help in precision and give a good user experience down the line. This scanner uses the method of photogrammetry to create a high-resolution interface. The basic idea while using a good camera is to take multiple photos of the object so that every detail is captured.
One of the most important pieces of hardware is a rotating platform so that all the angels are taken into account and there is no issue with the input. There are online tutorials and open-source software to take advantage of. It is somewhat more costly than the option mentioned above but will give a better experience.
Free software is there for processing the photos but a good program will have to be licensed for about $150 that can increase the upfront investment in the project. The photogrammetry program should be good enough so that your efforts are not wasted. If you need some assistance, sites like 3d-scantech.com can help you out.
Human-Sized 3D Scanner
Materials Required
- 47 Raspberry Pis
- Regular Materials as mentioned above
This is something that goes beyond the needs of regular DIY enthusiasts. If you have the requirement for a scanner for bigger projects, this option is perfect for you. Sometimes, people have very specific projects in mind. For instance, if you want to 3D print your pet or child, this is an option that would be big enough to capture the entire picture.
The uniformity in scanning is important for scaling. All the parts should line up well if not be printed together. It is very difficult to do in smaller machines. A bigger option is perfect in this scenario and you will need 47 Raspberry Pis to make it happen.
The detail is an important part of this entire project so you will need some investment that will go beyond that of the basic alternatives mentioned before. It will still be cheaper than the professionally manufactured counterpart. Online tutorials and furious are there to fall back upon in case of any hiccups.
Other Options
- Standalone 3D Scanner: This is a very simple design that will scan and save the data into a memory card slot. You do not need separate compiling software into a photogrammetry program. This one will do it for you. The resolution might be the only drawback.
- Raspberry Pi and Arduino 3D Scanner: Except for the obvious materials mentioned in the name, that project will also require a stepper motor and driver. You can use some spare parts from other projects during construction and cardboard would work too.
- Optical CT/3D Scanner: It is a very specialized scanner so make sure you do it by the book. The light during the scanning can be better done because everything is in a box that is in a controlled environment.
Which is Cheaper?
If you feel that all of these methods are too much work, you can compare prices and understand why people are going towards building their equipment. The base price of a new 3D scanner is $700 which can easily reach as much as $10,000 depending on the type of specifications one would want. The more features there are, the more expensive the purchase would be.
On the other hand, the materials for a 3D scanner that you can build at home would cost a few hundred dollars at the most. The maximum price can be capped at $250. It can also be as low as $35 depending on how you source the material. The time you spend on construction is also a big factor. And the money you save would somewhat go into your own hard work.
The Takeaway
Building a 3D scanner is perfect for anyone who wants to save some money and create something new themselves. Of course, one would require all the help they can get which is readily available online.
 Hi Boox Popular Magazine 2024


